
The blog about cooking like a man, racing, cars, motorcycles, whatever.
Showing posts with label fabrication. Show all posts
Showing posts with label fabrication. Show all posts
Friday, February 10, 2012
Wheels and more wheels
I am excited to have my first thing built on a water jet cutter. I needed a special trigger wheel for my Subaru/DTA combination and couldn't find what I needed. I went to see my friend Eric, and he made me a whole pile of them.
 Aint they pretty?
Sunday, January 29, 2012
More Buggy Stuff

system is done.
I still need to build a balance tube between the two sides, and my plan is to plumb all the sensors into that. Boost gauge, MAP sensor, and a blow off valve.


Not easy to see in the photo, but the oil pan has been shortened to where it is just above the bumper tubes.
The welding on the bottom is a sump for the pickup tube, which also had to be shortened. I borrowed some play dough from a mom at work and checked the clearance between the 2, just right! I still have some square tube to weld to both sides yet, to add capacity.


To give you an idea of how small those turbos are, the flange adapter I made is the size of a standard bug intake manifold.
This picture doesn't do it justice, but the TIG welding my buddy Joe did on the stainless exhaust is really nice. The way the 2 primaries merge together is a thing of beauty.
Saturday, January 21, 2012
Buggy Progress
 Not much to show for all the time I've spent. There's a lot of little parts to make, like these turbo water supply lines. Now they need to be beadblasted and painted.
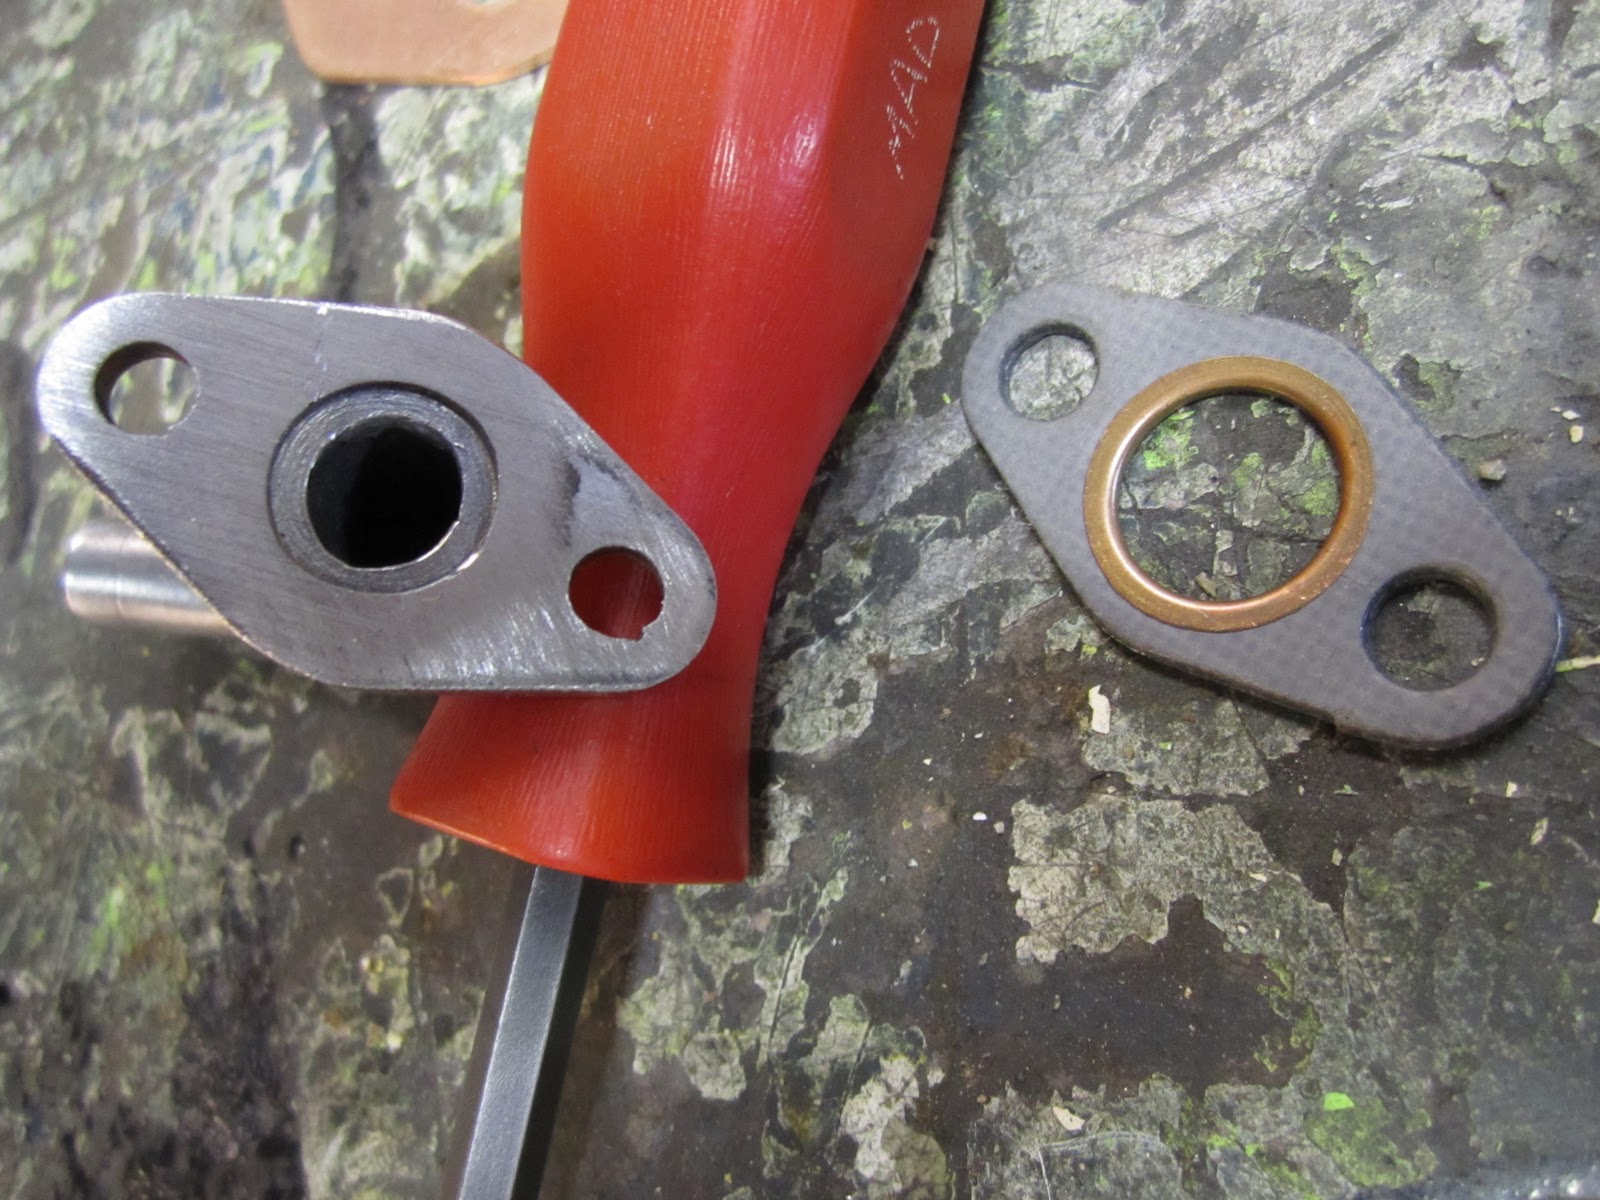
These turbo drain fittings took a while, I spot faced a recess into the center to prevent oil from pooling up in there. Those kind of details won't really be noticed but anyone but me, but it's part of my mental health therapy.

Here's an example. I got so tired of trying to find the turbo outlet gaskets, I just made my own out of solid copper sheet.
Monday, January 9, 2012
Back to the Future Buggy
The lack of recent posts is because all my effort lately has been going into my dune buggy project. Here's a pic from the old days.
 I've had this car some 20 years, and it's why I got started autocrossing. I just wanted a place to drive it, and it was not yet street legal. However, once I started racing it, my priorities changed, and all I did was make it faster on course. At one point, I was the fastest car of the day, but then it was time to build the A-Mod. That's another story. About 5 years ago, some dumbass backed into the buggy and that put it into the back of the shop. I started to rebuild it a year or so later, but then got busy with other things. It has taken me quite a while to even remember where I left off.
 By the way, that spoiler looking thing on the front was only partially for aerodynamic purposes, mostly it hid a 40 pound chunk of steel cantilevered as far forward as possible. The buggy had enough power that turning and accelerating could not be done at the same time!
I aquired a Subaru EJ22 from a friend, and decided that's what would power the buggy. But then, after I ran Bonneville, I had this little turbo left over, so I figured I would just buy another one, and make it twin turbo.
 |
| Isn't it cute? |
This little turbo can only make 90 to 100 HP, but there's 2. The engine stock is 140. Obviously, I am not trying for max power, I just think it's cool. That philosophy is being applied to the whole project, and I am fabricating things just because I can, or just for the hell of it. Here's a little mount I made to support the front fenders, it uses a Rabbit radiator mount for flexibility.

The engine has so few miles that this paper label never came off the cylinder head.

Everything is solid mounted, so I made engine mounts that attach to the rear bumper. A double bolted connection is not the best way to do it, but was neccesary to allow the bumper to go on and off. The oil filter just touches the cage, so I will have to find something smaller.


Here's the bracket to mount the Geo Metro alternator.


Sunday, December 11, 2011
Cool Race Fab Ideas
This should have been posted way back in July when it happened, but I was busy. When I worked the scales at the ICSCC races, I looked around the cars and found 2 genius ideas.
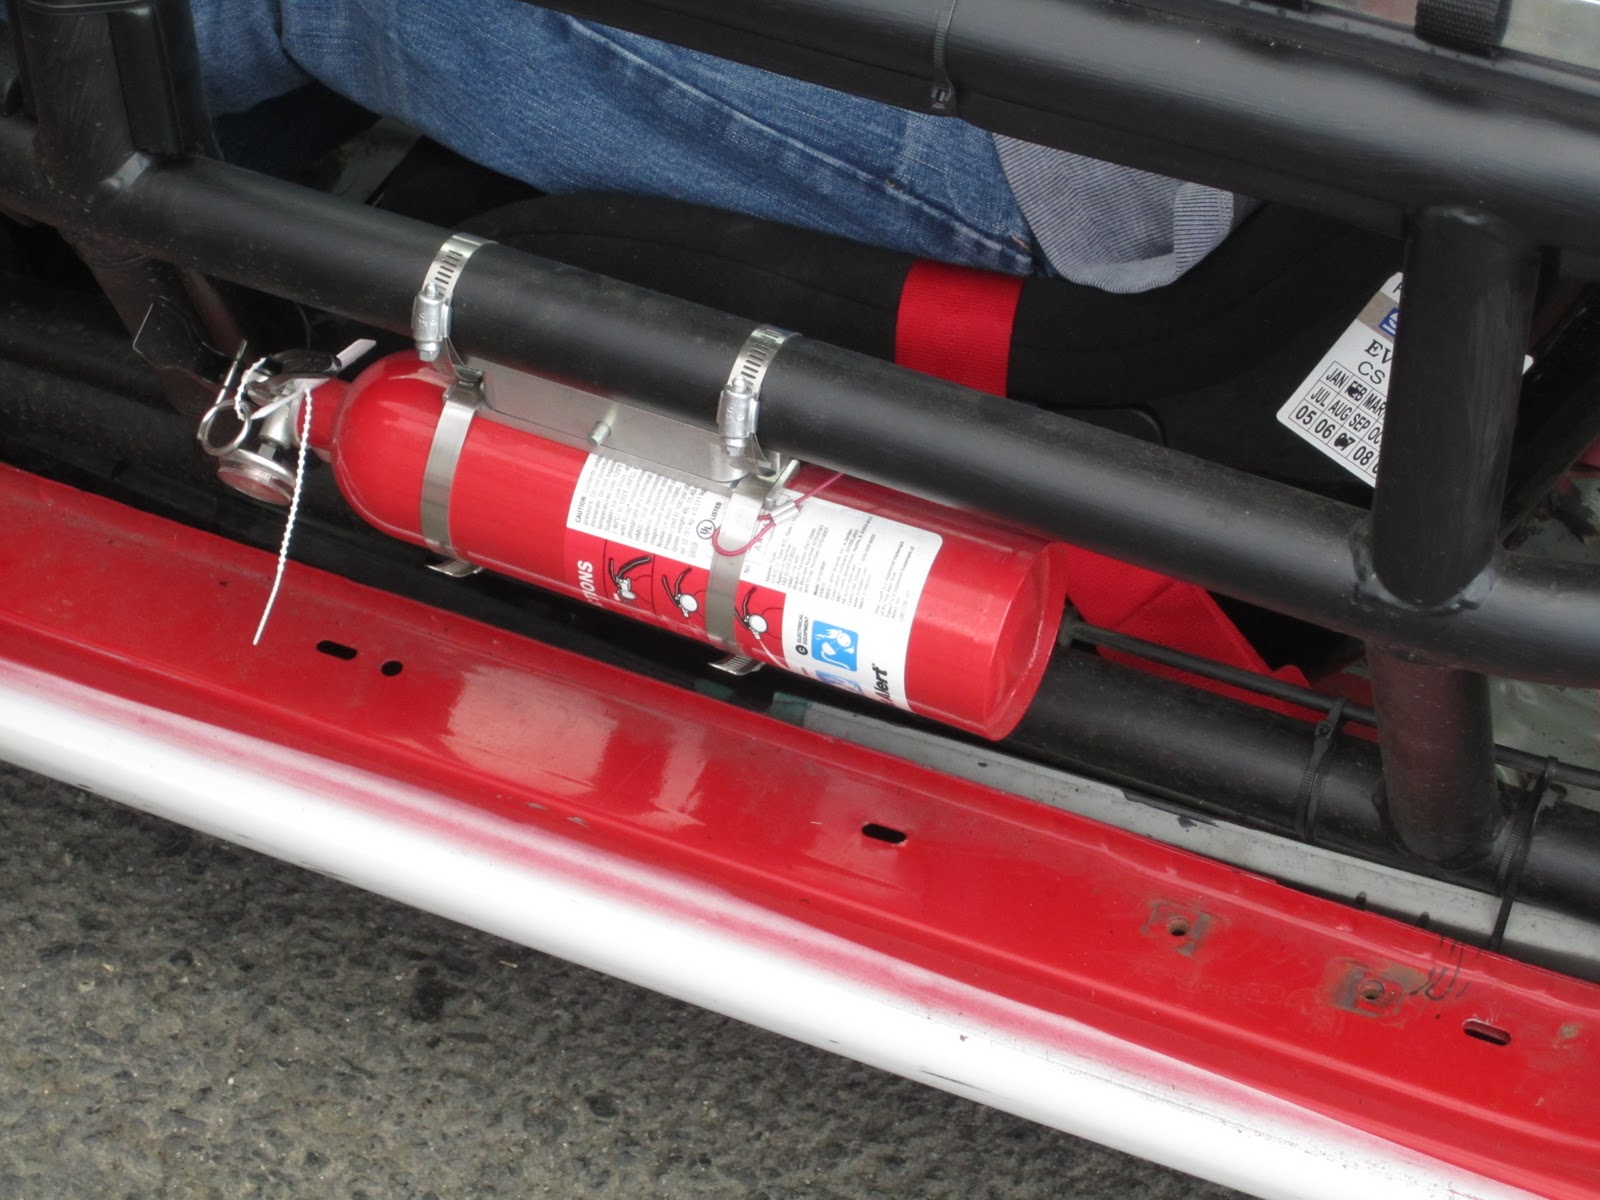
The first one: If your car is on fire and you are able to stop and get out, and then you feel like using the mandatory on board fire extinguisher, where would you like that to be? Bolted to the floor of the passenger side (where everyone puts it) so that you have to reach back into the burning car you just jumped out of? No, that's stupid. How about just inside the door where all you have to do is pull a quick pin.

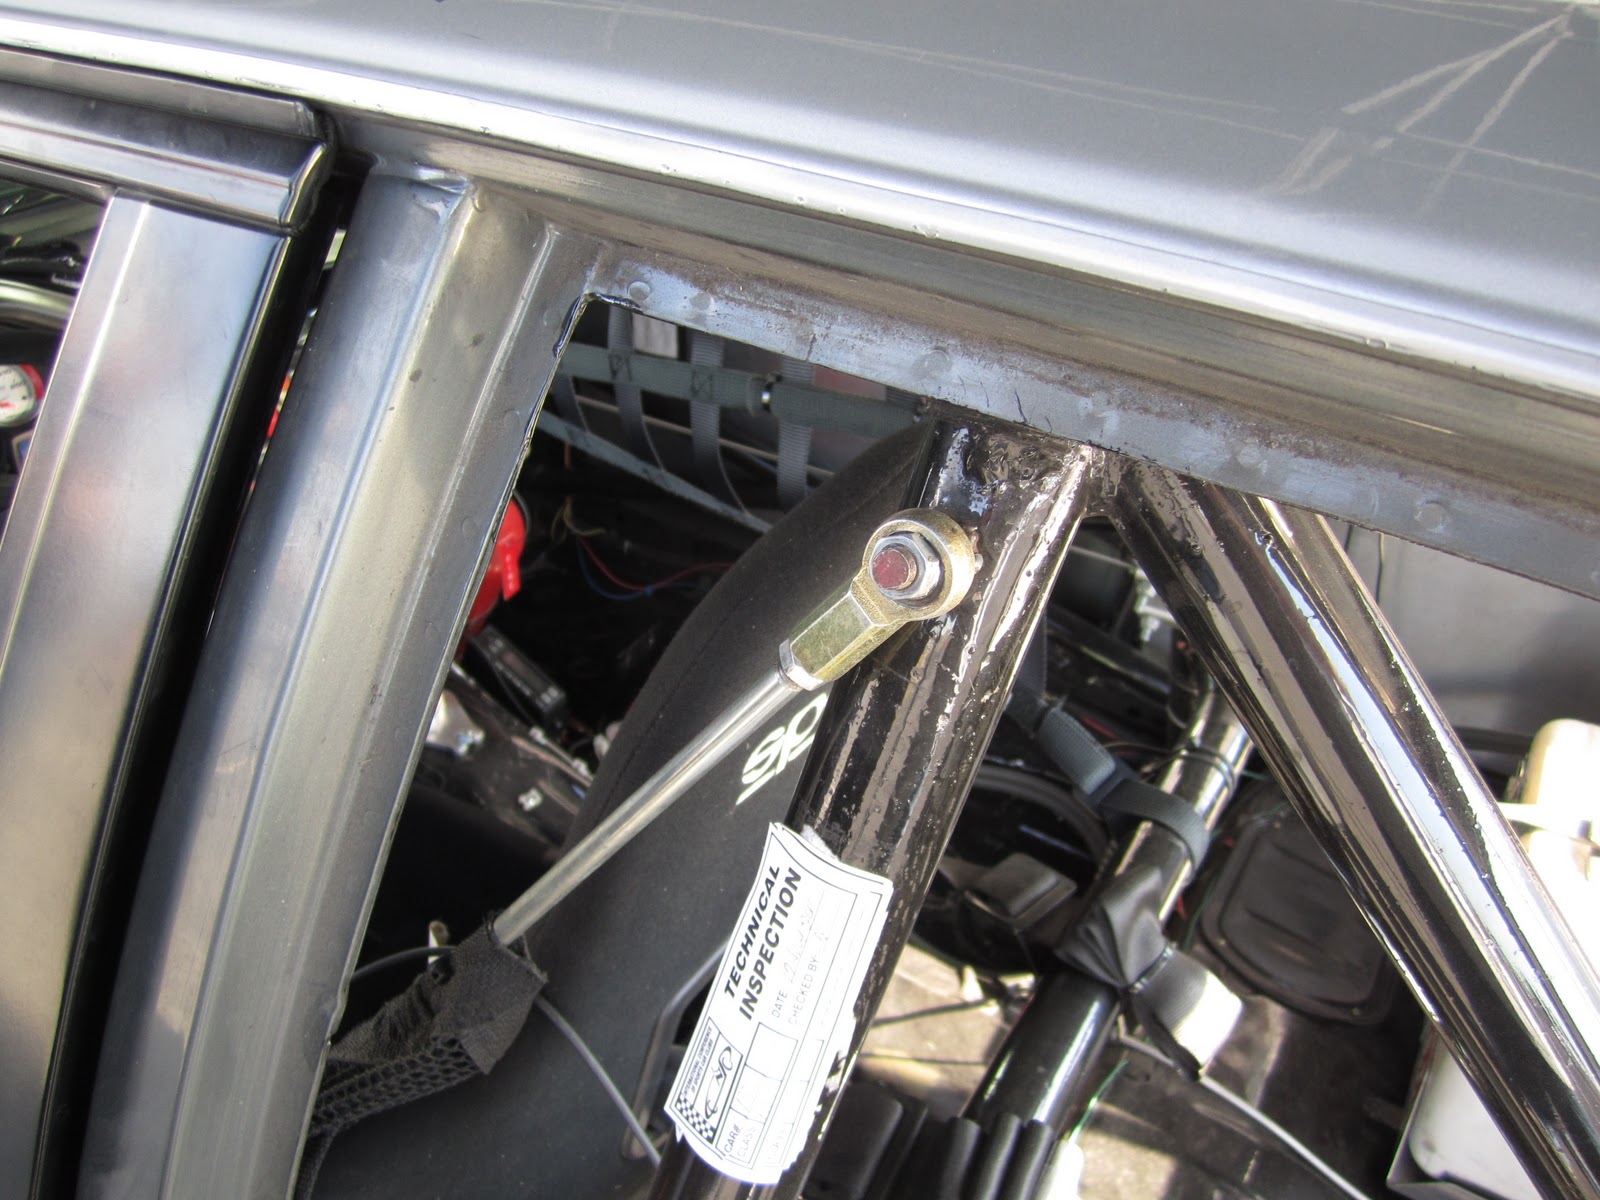
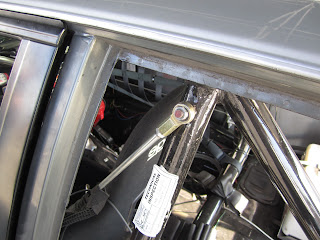 The second great idea: You know how everybody installs the window net into a hole on one end, and a seat belt latch on the other? That pretty much is impossible to do by the driver once he's strapped in isn't it? What if one end was attached by a heim joint? Then the net can still drop out of the way, but it's always attached, and all you have to do is swing it up.
The first one: If your car is on fire and you are able to stop and get out, and then you feel like using the mandatory on board fire extinguisher, where would you like that to be? Bolted to the floor of the passenger side (where everyone puts it) so that you have to reach back into the burning car you just jumped out of? No, that's stupid. How about just inside the door where all you have to do is pull a quick pin.
 The second great idea: You know how everybody installs the window net into a hole on one end, and a seat belt latch on the other? That pretty much is impossible to do by the driver once he's strapped in isn't it? What if one end was attached by a heim joint? Then the net can still drop out of the way, but it's always attached, and all you have to do is swing it up.
Subscribe to:
Posts (Atom)